
By Chris Choi, Technical Sales Manager at MVS Lighting
There’s no single correct distance between street light poles — the right spacing comes out of pole height, distribution type, and the road’s uniformity target, considered together. Give three different projects the same pole height and you can easily get three different correct spacing answers, because the fixture’s distribution type changes the calculation each time. This guide walks through the actual relationship rather than handing you one fixed number.
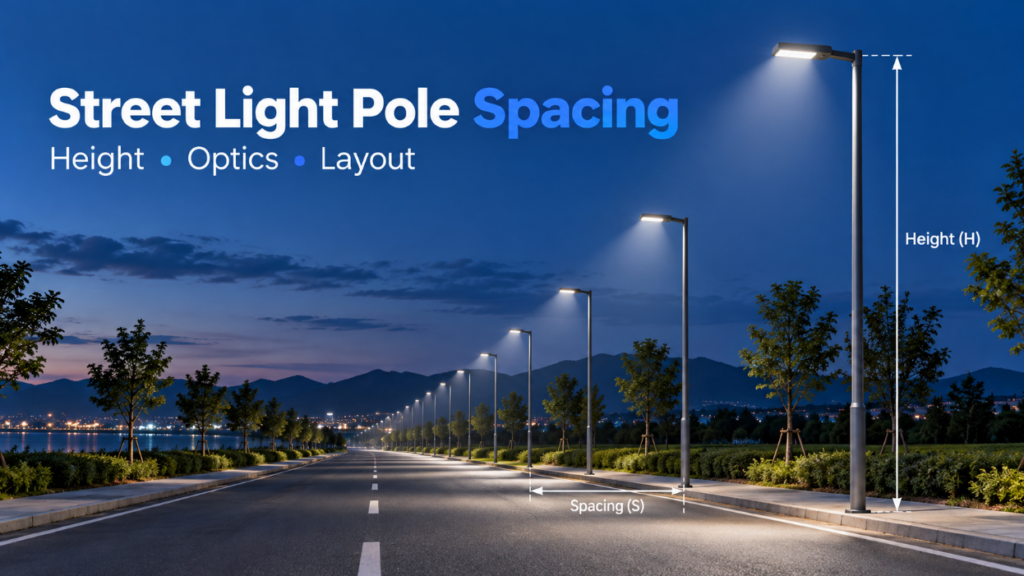
The S/H Ratio: The Starting Point for Spacing
The standard starting formula in road lighting design is the S/H ratio — spacing (S) divided by mounting height (H). Rather than a single fixed multiplier, this ratio moves with the fixture’s distribution type:
- Narrower distributions (Type II) generally support an S/H ratio of roughly 3–3.5
- Medium/bat-wing distributions (Type III) — the most common choice for standard roads — typically support roughly 3.5–4.5
- Wide distributions (Type IV) can often support 4–5 or slightly higher, which is exactly why Type IV is the go-to choice on large-span roads where minimizing pole count matters most
For the full breakdown of what each distribution type is and when to use it, see our distribution types guide.
Worked example: a 10m pole using a Type III fixture, at an S/H ratio of roughly 3.5–4, gives a starting spacing estimate of about 35–40m. A 10m pole with a Type IV fixture at an S/H ratio of 4–5 could support 40–50m instead — same pole height, meaningfully different spacing, purely because of the distribution type paired with it.
Treat this as a first-pass estimate, not a final answer. It gets you in the right range quickly; the actual number needs to be confirmed against uniformity and lux/luminance targets through simulation before it goes into a design.
Why a Fixed “Meters Between Poles” Number Doesn’t Work
Generic tables online — “6m poles: 25m spacing, 8m poles: 30m spacing,” and so on — leave out the two variables that actually swing the answer the most: distribution type and the uniformity target for the specific road class. The same 8m pole height can correctly support anywhere from roughly 25m to 40m of spacing depending on which fixture distribution it’s paired with and how strict the uniformity requirement is. A single number presented without those two inputs isn’t wrong so much as incomplete — it’s only valid for the one combination it happens to assume.
How Layout Pattern Changes the Spacing Calculation
Pole spacing doesn’t get calculated the same way for every arrangement.
Single-sided arrangement needs each pole to independently maintain uniformity across the full road width, which tends to call for tighter spacing relative to the S/H ratio than a layout that shares coverage between two rows.
Staggered arrangement alternates poles between both sides, so the effective spacing along either single side is roughly double the spacing between consecutive poles overall — this is a common point of confusion when comparing a staggered layout to an opposite one at a glance.
Opposite (double-sided symmetric) arrangement splits coverage evenly between two facing rows, which generally allows each row to run at a spacing closer to the upper end of the S/H range for the chosen fixture.
For the full comparison of when each layout pattern applies, see our street light layout types guide.
Verifying Spacing Against Uniformity
The S/H ratio gets you a starting number; uniformity is what actually confirms whether that number works. A spacing that looks fine on the S/H calculation can still fail if the road’s uniformity requirement is strict, or pass with room to spare if the requirement is more relaxed — the ratio alone doesn’t know which situation you’re in.
This is also where road classification and the applicable lighting standard matter directly: an EN 13201 M1 or M2 road carries stricter uniformity requirements than an M5 or M6 road, and that difference should pull your final spacing tighter even at the same pole height and distribution type. See our EN 13201 road lighting standards guide for how class determines the actual performance criteria your spacing needs to hit.
From Spacing to Pole Count
Once spacing is set, the number of poles a project needs follows directly from road length and layout pattern — but that’s a distinct calculation from spacing itself, and it’s easy to get a rough pole count wrong by assuming spacing alone without accounting for arrangement. For working out how many fixtures a specific road actually needs, see our street light quantity guide.
Common Pole Spacing Mistakes
Using a fixed spacing number regardless of distribution type. The same pole height supports a real range of spacing depending on the fixture’s optics — a single number ignores that.
Confusing staggered spacing with opposite spacing. The pole-to-pole distance in a staggered layout isn’t directly comparable to the same number in an opposite layout, because the effective coverage per side is different.
Skipping the uniformity check. An S/H-based estimate is a starting point, not a verified result — always confirm against the actual uniformity requirement before finalizing a layout.
Copying spacing from a different road class. A spacing that comfortably meets requirements on a low-traffic local road won’t necessarily meet the stricter uniformity demands of a busier arterial road, even at a similar width.
Getting to a Final Spacing Number
Start with the S/H ratio for your chosen distribution type and pole height to get a working estimate, adjust it based on your layout pattern, and confirm the result against the uniformity and luminance targets set by your project’s applicable standard — ideally through an actual lighting simulation rather than the estimate alone. For the complete design workflow this fits into, see our road lighting design guide.
FAQ
What is a good S/H ratio for street lights? It depends on the fixture’s distribution type — roughly 3–3.5 for narrower Type II distributions, 3.5–4.5 for the more common Type III bat-wing distribution, and 4–5 or higher for wide Type IV distributions. Always verify the result against your project’s uniformity target.
Does taller pole height always allow wider spacing? Generally yes, but not on its own — spacing scales with height through the S/H ratio, but the actual multiplier still depends on the fixture’s distribution type and the road’s uniformity requirement, not height alone.
Is spacing the same for staggered and opposite layouts? No. In a staggered layout, poles alternate sides, so the effective spacing along either single side is roughly double the pole-to-pole distance. In an opposite layout, poles face each other directly at the stated spacing on both sides.