
Written by Chris Choi, Technical Sales Manager at MVS Lighting, with practical experience supporting overseas buyers on LED street lighting projects.
Highway LED street lights are commonly selected in the 150W–300W range and installed on approximately 10–18m poles, depending on the road width, number of lanes, pole arrangement and required lighting performance. Type II or Type III asymmetric optics are generally used to direct light along and across the carriageway, while the final pole spacing must be verified through an IES-based lighting simulation. For highway projects, wattage alone is not enough — luminance, uniformity, glare control, surge protection and maintenance access all need to be considered together. For a broader overview of road lighting fundamentals and project planning, see our LED street light guide.
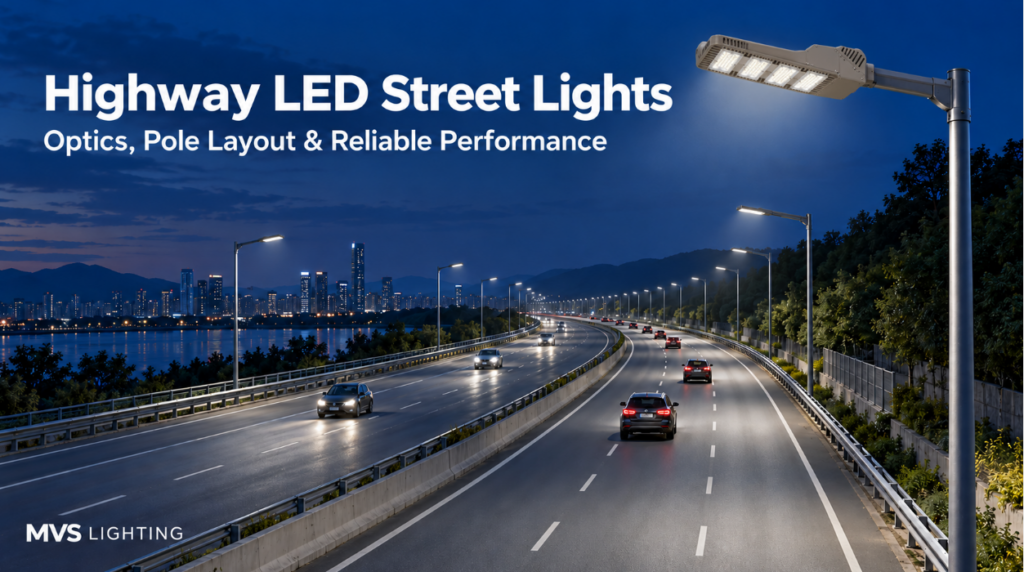
Highway Lighting Requirements
Continuous driver visibility. High-speed driving needs consistent, uninterrupted visual information ahead — noticeable bright-to-dark transitions along the road are a bigger problem at highway speeds than they are on a slow local street.
Lighting uniformity. Hitting the average brightness target isn’t enough on its own; both longitudinal uniformity (along the direction of travel) and overall uniformity across the road need to be controlled.
Glare control. Higher wattage and greater mounting height both increase the risk of discomfort glare if the fixture’s optics aren’t properly controlled — and glare is a more serious problem at highway speed, where a driver has less time to adjust. This is exactly the kind of scenario the BUG rating system was built to quantify; see our glare and light pollution control guide for how to specify glare performance rather than just assuming a “highway-rated” fixture has it handled.
Reliable outdoor operation. Highway fixtures are typically harder to access for maintenance than urban street lights, which makes protection rating, surge protection, and driver stability more important than they might be on a lower-stakes project.
Highway Wattage and Pole Height
| Initial Wattage | Pole Height | Road Condition | Typical Use |
|---|---|---|---|
| 150W | Lower end of range | Narrower expressway sections | Lower mounting heights, moderate lane count |
| 200W | Mid-range | Main highway sections | Higher light output and wider coverage |
| 300W | Higher end of range | Wide, multi-lane highways | Taller poles, larger infrastructure roads |
These are starting points for evaluation, not a fixed answer — the final wattage depends on pole height, spacing, and the road’s actual lighting target, and should always be confirmed through simulation rather than selected from a table alone. Compare output ranges in our LED street light wattage guide before selecting a preliminary highway fixture wattage, and check mounting height against our street light pole height guide.
Highway Road Lighting Optics
Highway lighting generally needs an asymmetric distribution that throws light both along the road and across its width — Type II or Type III optics are common choices depending on road width, pole position, and layout, though we won’t get into the full distinction between distribution types here. What matters at the highway-application level is that the optic reaches the far lane without excessive spill beyond the road edge, and that whatever’s specified is backed by an actual IES file for that specific wattage, lens, and fixture configuration — not just a “Type III” label on a spec sheet.
Compare Type II, Type III and other street light distribution types before confirming the highway optic for your project.
Highway Pole Layout and Spacing
Single-sided layout sometimes applies on narrower ramps or constrained sections, though it’s less common on full-width highway carriageways.
Opposite-side layout is typical for wider, multi-lane sections, where facing poles on both sides improve lateral coverage across more lanes.
Median lighting — a single row of poles in the central divider — is used on some projects, but needs careful consideration of installation access, maintenance, and crash protection given the location.
Pole spacing itself is shaped by mounting height, distribution type, wattage, road width, and uniformity requirements together — use our dedicated pole spacing calculation guide to estimate the initial distance between highway poles.
Verify the Highway Lighting Design
Before finalizing a highway lighting configuration, a simulation needs the following inputs: road width, number of lanes, central divider presence, pole height, pole position, initial spacing estimate, road surface type, and the project’s applicable lighting requirement.
From there, the correct IES file — matched to the actual wattage, lens, and fixture configuration being specified — gets run through the simulation, and the results should be checked against luminance and uniformity targets, not just average lux. It’s also worth specifically reviewing the output for dark sections along the direction of travel and any areas of excessive brightness or glare that could affect visibility. Follow our complete road lighting design guide for the full process from road data to lighting verification.
Highway Lighting Standards
Applicable lighting requirements vary by country, highway classification, and individual project tender documents — there’s no single global number that applies to every highway. The road’s actual class, determined by function, traffic volume, speed, and usage conditions, is what sets the real requirement, and a generic lux reference is only useful for early-stage orientation, not as a substitute for the project’s actual standard.
European projects should confirm road classes and performance requirements under EN 13201 road lighting standards.
Highway Surge Protection
Highway lighting circuits — poles, cabling, and the outdoor distribution network feeding them — are exposed to both direct/induced lightning risk and switching surges from the grid, often more so than urban installations given how open and elevated highway sites tend to be. Fixture-level surge protection needs to be designed alongside the project’s grounding and distribution protection, not treated as a standalone spec. If the project includes control interfaces or individual fixture controllers, those electronic components carry their own surge exposure and should be reviewed separately.
Review suitable protection levels in our LED street light surge protection guide.
Maintenance and Product Reliability
Highway maintenance is inherently more expensive and disruptive than urban street light maintenance — lane closures and limited nighttime work windows both add cost, which makes driver and LED reliability directly tied to long-term maintenance frequency. A tool-free electrical compartment, modular components, and well-organized wiring all reduce how disruptive a field repair actually is. Protection rating and corrosion resistance should be matched to the site’s actual exposure — coastal, humid, industrial, or high-salinity environments all call for a higher spec than a standard inland installation. Warranty scope, spare parts availability, and long-term driver replacement supply are worth confirming upfront rather than after an issue comes up.
Define the Highway Project Boundary
Continuous highway road lighting — street lighting along a highway or expressway mainline and its continuous lane sections — is what this guide covers.
Large interchange area lighting — major interchanges, toll plazas, and large-area high-mast floodlighting — falls outside this scope; those projects are generally approached through area/flood lighting design rather than standard street light layout.
Tunnel lighting — tunnel entrance zones, transition zones, and interior lighting — requires its own dedicated design approach separate from standard highway street lighting.
Where This Fits in the Bigger Picture
Highway lighting is one of several distinct application scenarios within road lighting design — industrial parks, residential streets, and other project types each come with their own priorities and trade-offs. See our street lighting applications hub to explore design considerations for other project types. <!– Street lighting applications hub (#42) link reserved — add after its final URL is confirmed; map has no slug for #42 yet –>
Final Highway Lighting Checklist
Road data: width, length, number of lanes, central divider, road surface condition.
Lighting configuration: wattage, lumen output, distribution type, pole height, spacing, layout pattern.
Electrical requirements: input voltage, surge protection level, dimming and control interfaces.
Project verification: applicable standard, IES file, lighting simulation report, warranty and maintenance plan.
My View: Start From the Road, Not the Wattage
In my view, the most common mistake on highway projects is starting from wattage. Buyers often ask for a fixed wattage because it is the easiest number to compare, but on a highway the result depends just as much on pole height, spacing and the distribution of the optic. A higher-wattage fixture with the wrong distribution can still leave dark gaps between poles, while a well-matched fixture at a lower wattage can light the same road evenly. That is why I would ask for the road width, number of lanes, pole height and spacing first, and check the shortlisted fixture’s IES file in a lighting simulation before settling on a wattage.
FAQ
What wattage is commonly used for highway LED street lights? Highway LED street lights are commonly selected in the 150W–300W range and installed on approximately 10–18m poles. The right wattage depends on road width, number of lanes, pole arrangement and the required lighting performance, so it should be confirmed through an IES-based lighting simulation rather than chosen from a table alone.
Which optic type is used for highway lighting? Highways generally need an asymmetric distribution that throws light both along and across the road, and Type II or Type III optics are common choices depending on road width, pole position and layout. Whatever is specified should be backed by an IES file for that specific wattage, lens and fixture configuration, not just a “Type III” label on a spec sheet.
Should highway poles be on one side, both sides, or in the median? Opposite-side layout is typical for wider, multi-lane sections, where poles on both sides improve lateral coverage. Single-side layout sometimes applies on narrower ramps or constrained sections. Median lighting is used on some projects but needs careful consideration of installation access, maintenance and crash protection.
Do highway LED street lights need surge protection? Yes. Highway circuits are exposed to both lightning risk and switching surges from the grid, often more than urban installations because highway sites are open and elevated. Fixture-level surge protection should be designed together with the project’s grounding and distribution protection, and any control interfaces or fixture controllers should be reviewed separately.
What information should I send to get a highway lighting proposal? Send the road drawings, road width, number of lanes, whether there is a central divider, pole height, initial spacing, input voltage and the required lighting standard. With these, a suitable wattage and optical distribution can be recommended and checked with IES files and a lighting simulation.
Build a Reliable Highway Lighting System
The correct highway configuration depends on the actual road width, lane count, pole arrangement and applicable lighting standard. The final design should combine controlled road optics, verified spacing, suitable surge protection and practical maintenance access — not just a wattage number that sounds right for a highway.
Planning a highway or expressway lighting project? Send MVS Lighting the road drawings, road width, number of lanes, pole height, initial spacing, input voltage and required lighting standard. Our team can recommend a suitable wattage and optical distribution, supported by IES files and a lighting simulation proposal.
Request a Highway Lighting Proposal View the LED Street Light Series